
Ok ini projek DIY pertama aku wehh *eksaited*
Minor diy je ni, buat smoked signal lamp Wira. Setelah me-refer beberapa blog dan forum, aku pun mula berasa teruja nak buat diy sendiri.
dan memandangkan hari tu kaki terseliuh...jatuh longkang..malunye (-__-') , menyebabkan xdpt p gym la hari ni....so dari dok diam2 takde keje baik buat mende berfaedah ye dok? hehe.

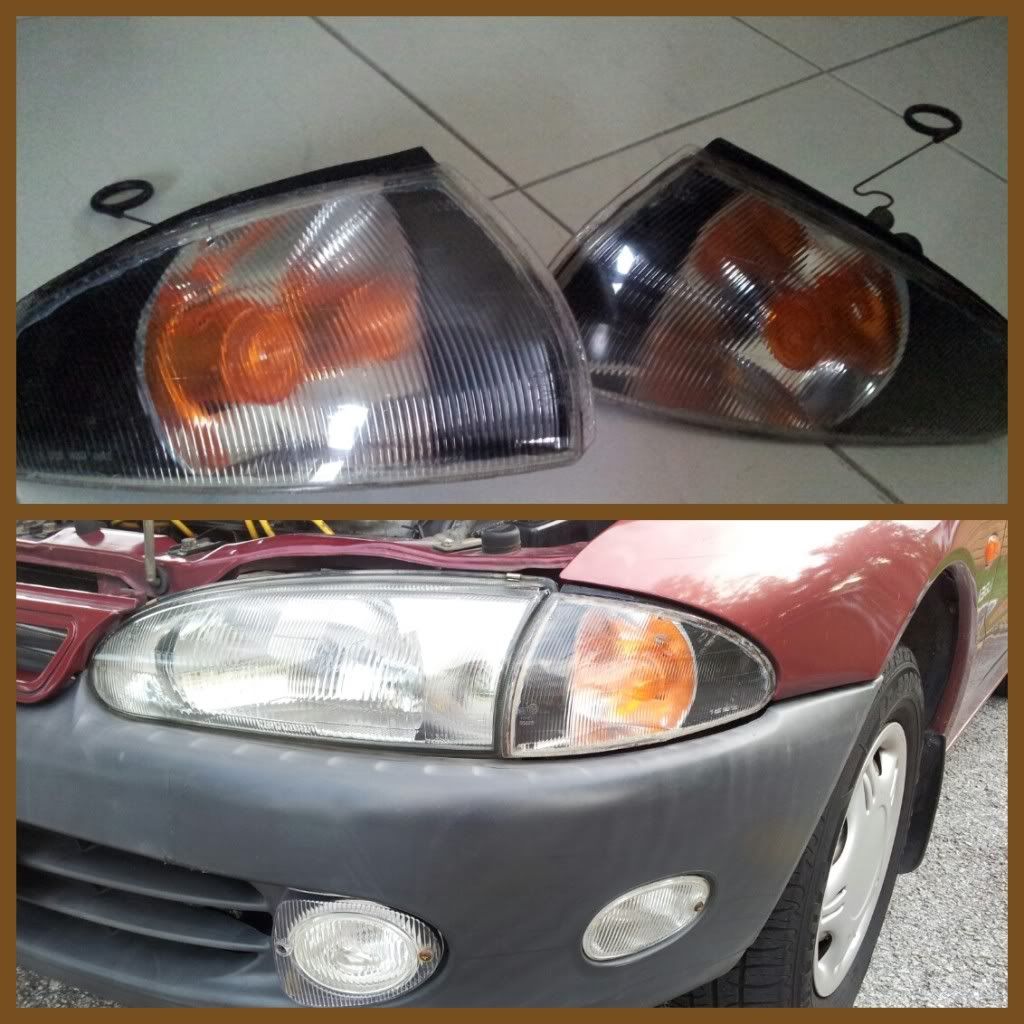 |
| Final product - mantap. |
Bahan-bahan yang diperlukan:
1. High temperature Black Spray
2. Silicone Adhesive
3. Masking tape
4. Air panas (to remove cover)
5. Torch light
6. Philips screw flat head (to pry open the glass/plastic)
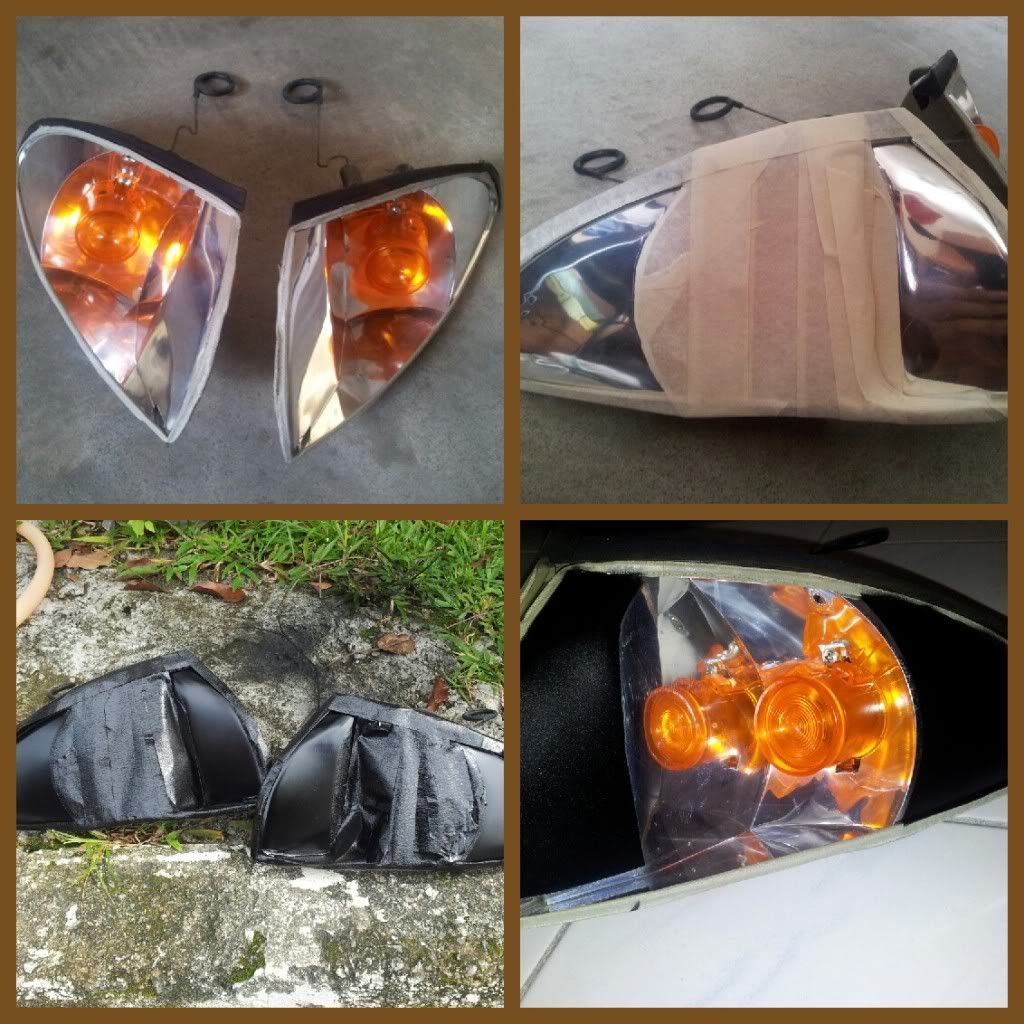 |
| Modding - Otw...done! |
Methods:
0. Buka hood *you Don't say*
2. Tarik spring tu then dah boleh release lampu signal tu.
3. Guna air panas (in certain case ada sorang forumer tu guna oven. Woah) or hairdryer to melt the glue, thus releasing the plastic/glass cover. Guna skru driver philips, umpil pelan2.
-step ni aku skip sebab my cover lekang voluntarily. maklumla, barang dh lama.
4. Letak masking tape around, leave some for the reflector. Kalo x malap lampu signal serupa tak dak, kan?
5. Then...spray away! Pastikan spray rata. Buat several layers. Allow each layer to dry about 10-15 minutes *refer the spray can*
-jaga2 jangan spray smpai tutup lubang ventilation tu..for when the lamp gets hot, air could come in. Look closer, there's 2 holes on each sides of the lamp.
6. Pasang balik, preferably pakai Silicone adhesive tadi. Make sure no water could sip in later. make it Water tight. Buat kemas2 yo.
7. Biar sampai kering, then pasang balik. Now sit back and take a look - ok la nampak ganaz sikit. lol.
All these are done under RM30. Worth it la considering you don't have to pay labour and get a new set of lamp which could cost twice...or thrice.
Pictures semua kat bawah. Anything refer pics.
Tu je la kot setakat ni. Nak dekat final exam ni...sempat lagi. hehe.
Wish all the best to all those who will be having their final examination in universities (including me.
Next DIY project maybe masa cuti la kot.
Ends.
Nota kaki:
1. thinking of getting an F1 brake lamp....got the item ady, but got no time ady.
2. Next project in line also, modding the headlamp to a smoked headlamp..using the same method.
3. Kudos to the forumers n bloggers that thought me with their posts. Thanks guys (Y)
4. [UPDATED] - next project in-line:
F1 brake lamp
door soundproofing
vanity mirror
smoked headlamp
Some pictures.
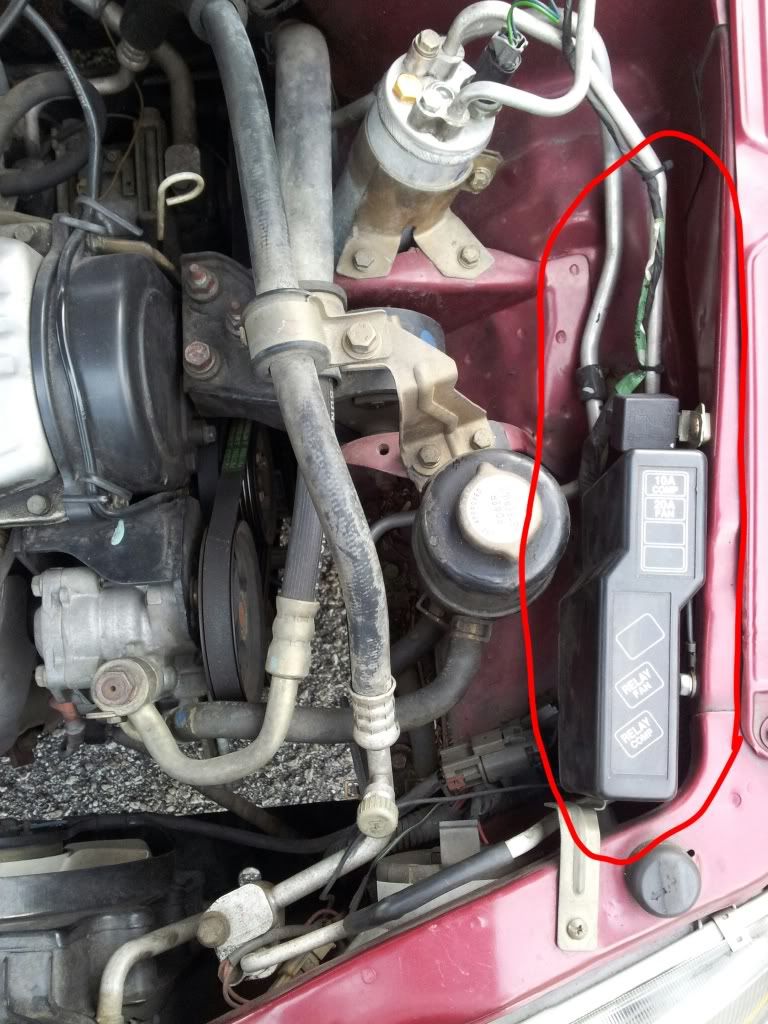 |
| LH: Under the relay fan box, there's the black ring. Pull it to release lamp |
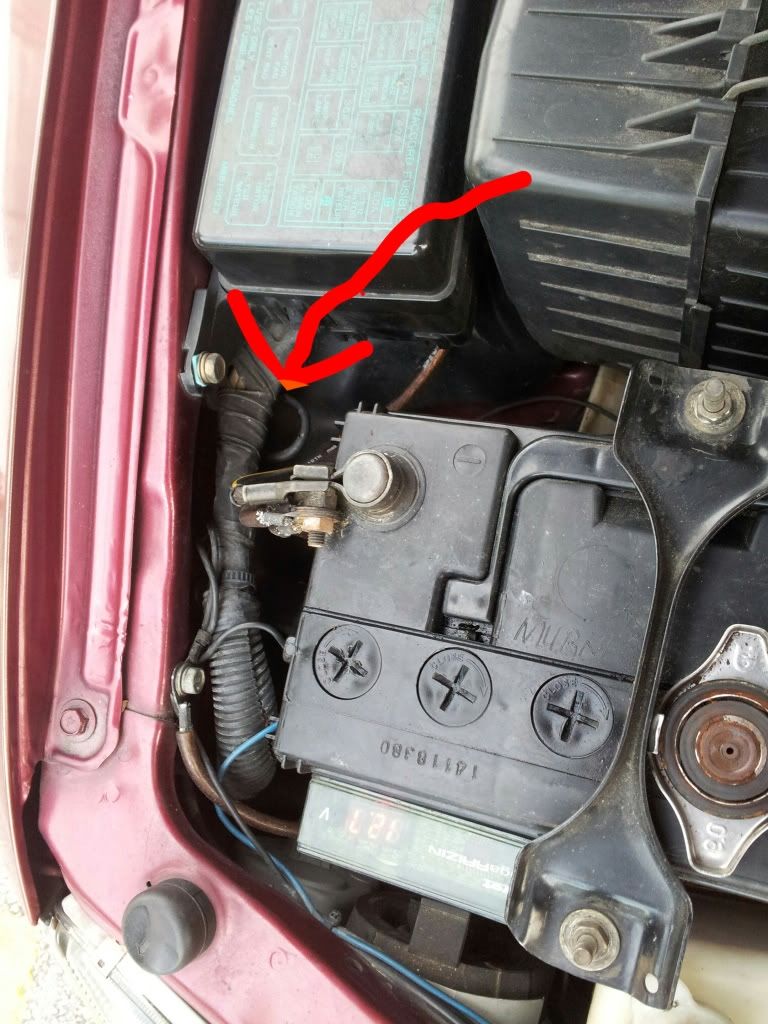 |
| RH: the arrow shows the black ring. Pull it hoh |
No comments:
Post a Comment